


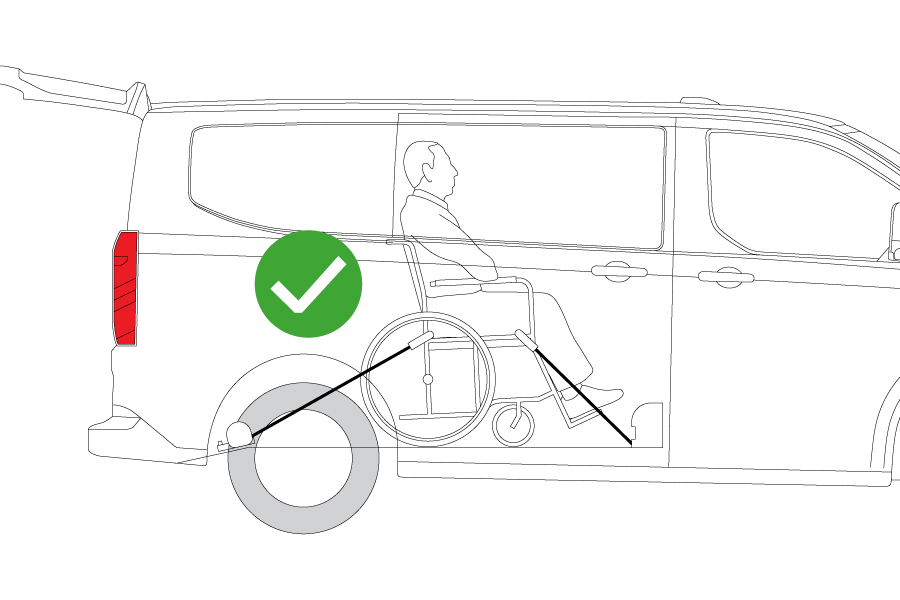
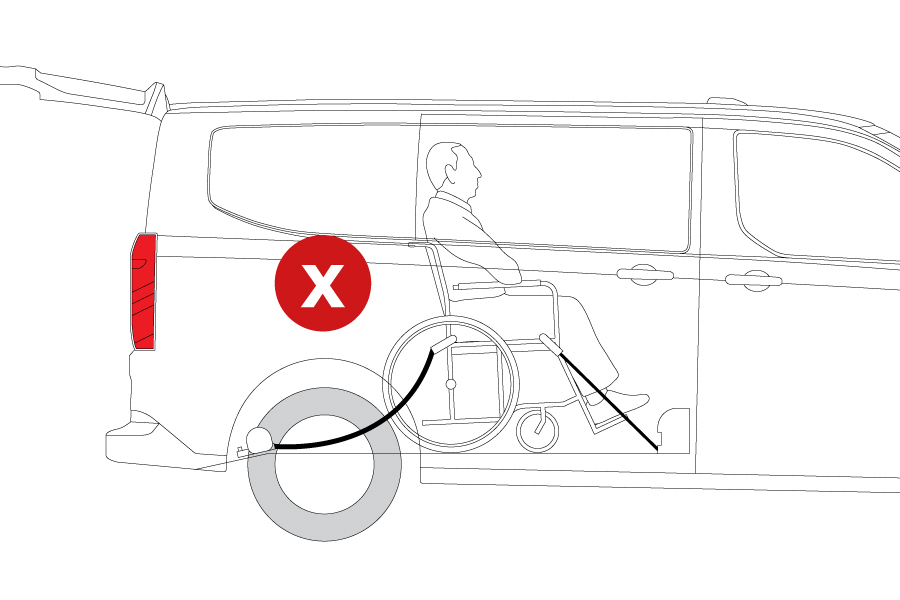
For effective use of the WAV restraint system the front and rear restraints should be attached to designated anchor points on the wheelchair, as close to the seat base as possible.
The recommended restraint angle when tensioned is 45º, on each corner of the wheelchair.
Follow our guide to identify the designated anchor points for your wheelchair here.
Step by Step: Attaching Wheelchair Restraints
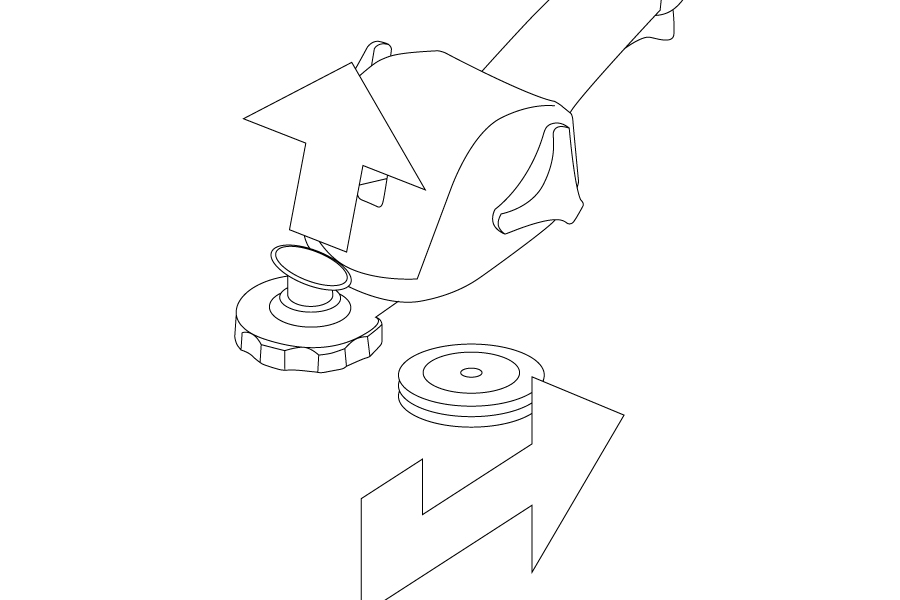
1. The rear restraints fit the mounting points at the rear of the floor. Slide the ‘U’ shaped cup over the mounting point whilst lifting the clasp to secure.
Your vehicle’s restraints may vary from those illustrated – for operating instructions for your restraints, refer to the restraint manufacturer’s instruction manual provided with your vehicle.
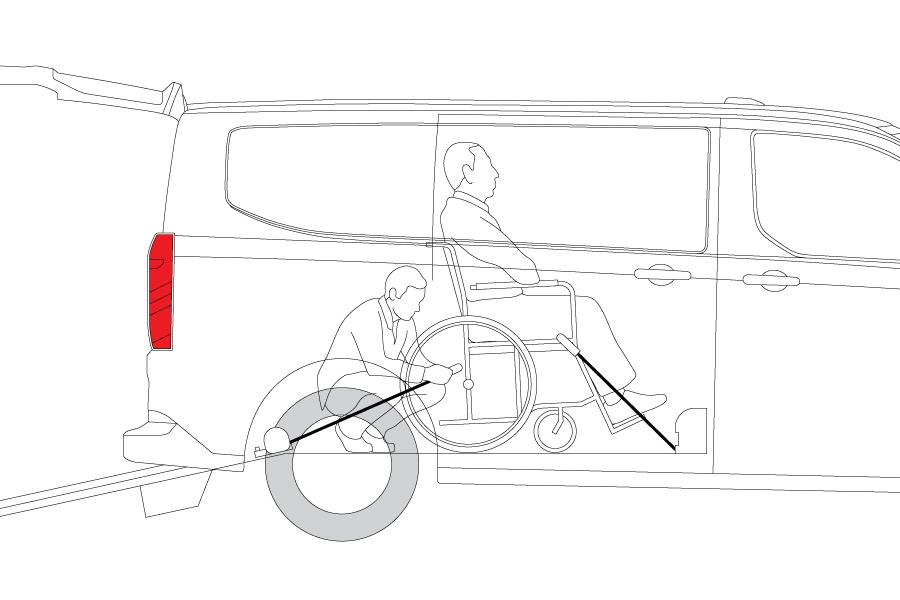
2. Attach the restraint to the wheelchair at the designated anchor point.
IMPORTANT:
It is recommended that wheelchairs used in vehicles are ISO 7176 compliant with marked designated anchor points carrying the hook symbol.
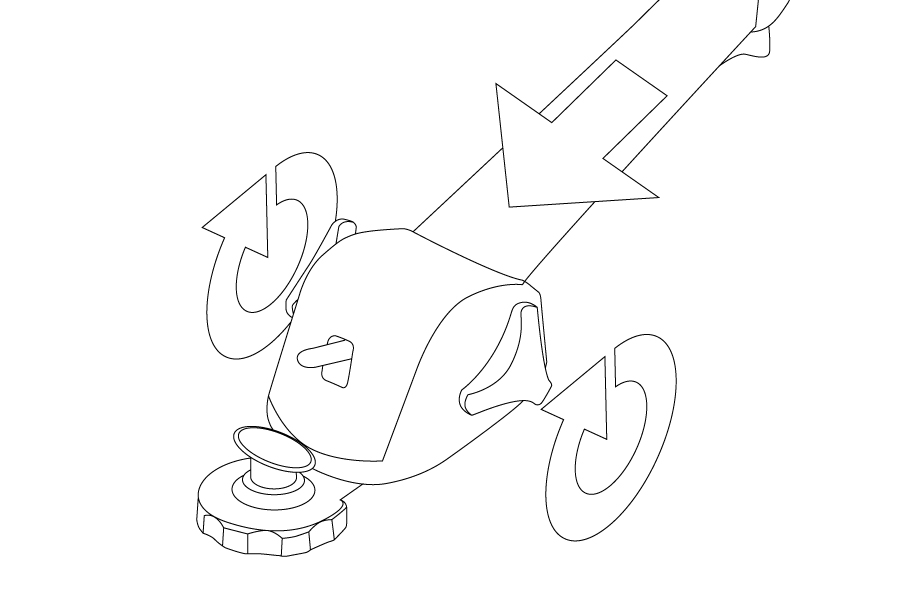
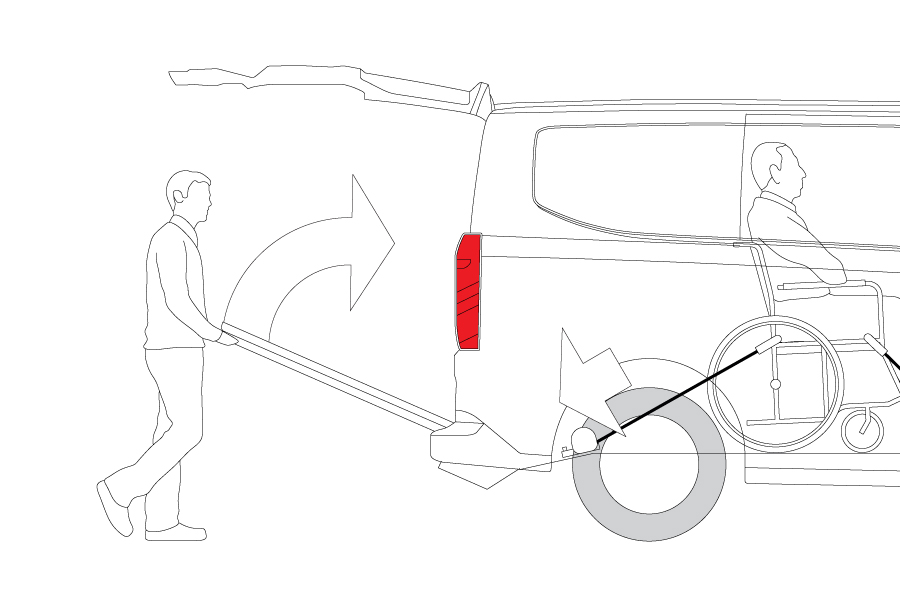
3. Ensure that the restraint is adequately tensioned.
Repeat the process 1-3 for the other restraint to complete the 4-point restraint system (2 front, 2 rear).
4. VEHICLES WITH STORQ SYSTEM
Some Brotherwood models are fitted with STORQ, a self-tensioning restraint system. If your vehicle is fitted with STORQ, it is advisable to only tension your rear restraints to remove any slack from the restraint belts. STORQ will apply additional tension as the ramp is retracted.
5. IMPORTANT:
Before setting off, ensure that all restraints are fully tensioned and that the wheelchair cannot move forwards, backwards or side to side.
Not only is this best practice for safe travelling but also to ensure a comfortable, stable ride for the wheelchair user.
5. IMPORTANT:
Before setting off, ensure that all restraints are fully tensioned and that the wheelchair cannot move forwards, backwards or side to side.
Not only is this best practice for safe travelling but also to ensure a comfortable, stable ride for the wheelchair user.